
|
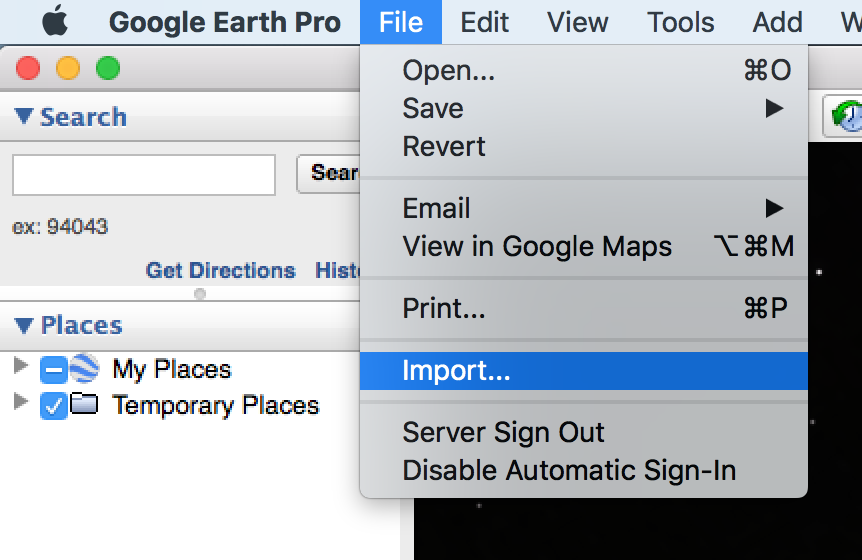
Risk Terrain Modeling (RTM) requires geo-referenced data that are often contained in tables, like spreadsheets or CSV (comma delimited) files. Geocoding is the process of transforming these data tables with descriptions of locations, such as addresses or XY coordinates, to locations on the Earth's surface. Common formats of outputs from the geocoding process are shapefiles (.shp) and KML/KMZ map files that can be viewed in a GIS (Geographic Information System), such as QGIS, or used for spatial risk analysis, such as with the RTMDx software. There are many batch geocoding services on the internet; some are free and others charge fees. Here we present a readily accessible and free geocoding option. You can easily geocode your data tables, export the feature points as KMZ files, and then use them for Risk Terrain Modeling. Check this out (7 steps): 1. Open Google Earth Pro on your computer. It's free to download. 2. Click "File" from the menu at the top of the screen, then "Import..."
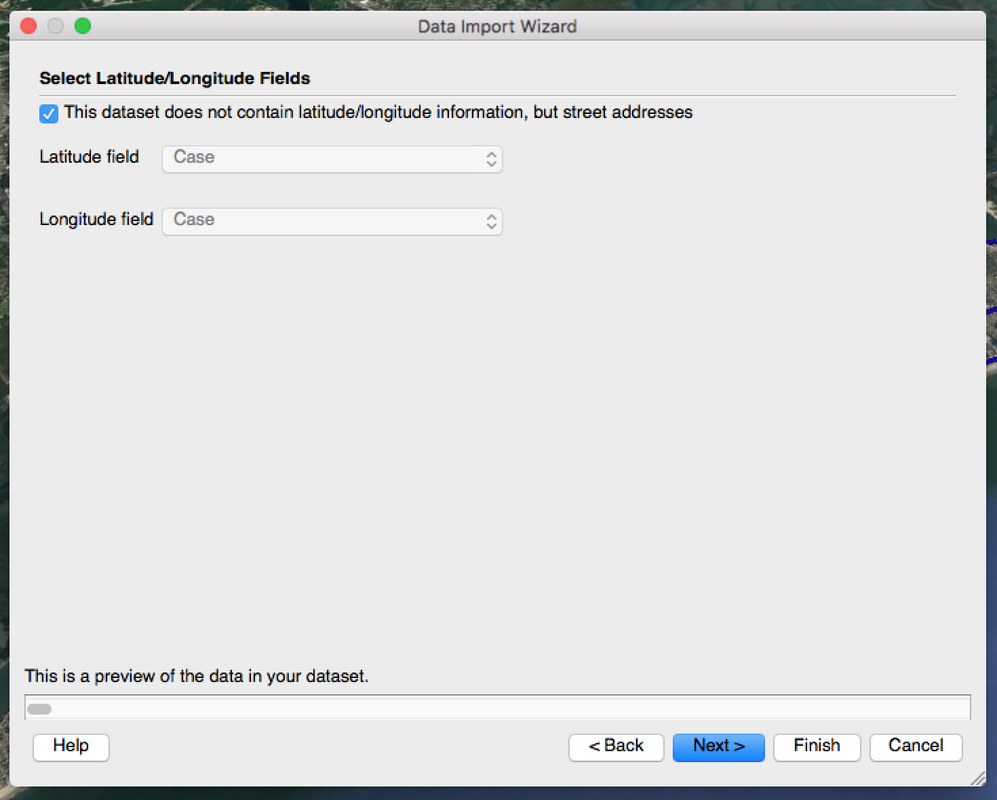
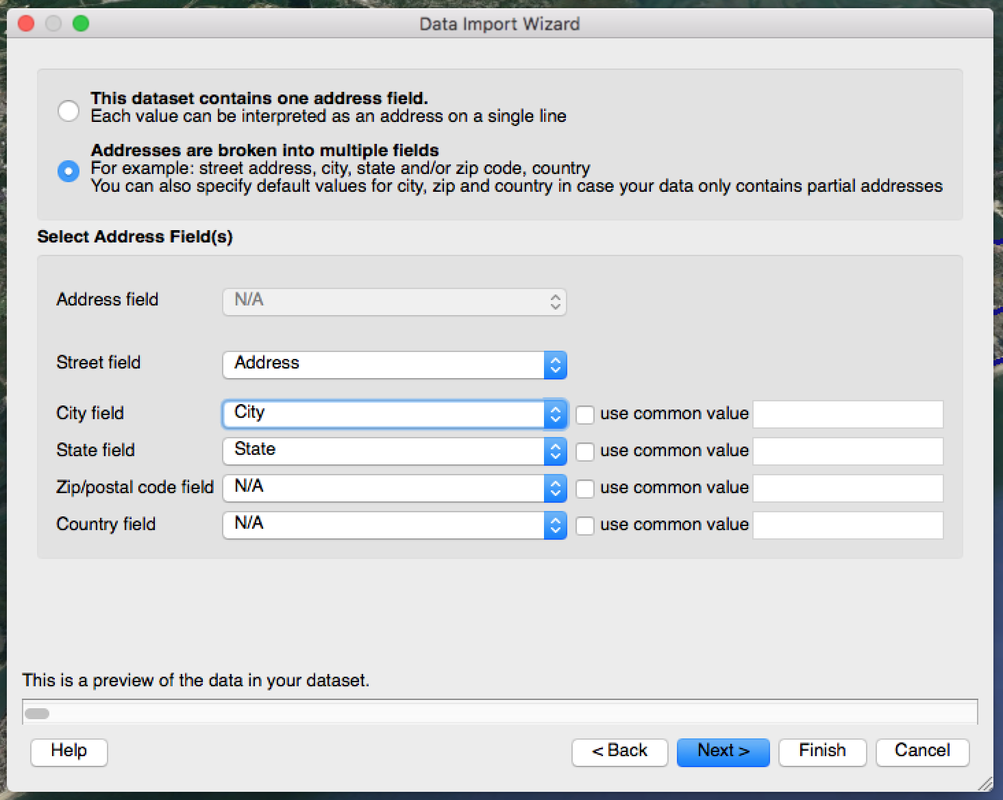
3. In the dialog box that appears next, select a CSV (comma delimited text) file to import and then click the "Open" button. This will be your data that has addresses or XY coordinates as one of the attributes. Note: Your data should contain street address, city, and state as their own columns. If you have XY coordinates, they should be in two separate columns. 4. Follow the on-screen instructions in the "Data Import Wizard". Click the "Next" button to proceed through the steps. Be sure to set the "Street field", "City field", and "State field" accordingly. 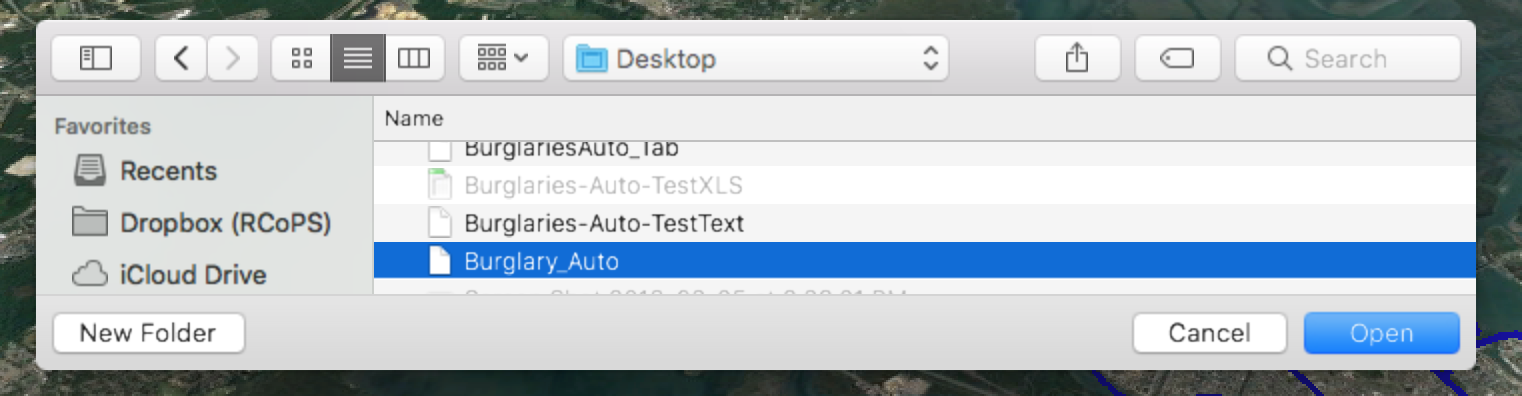
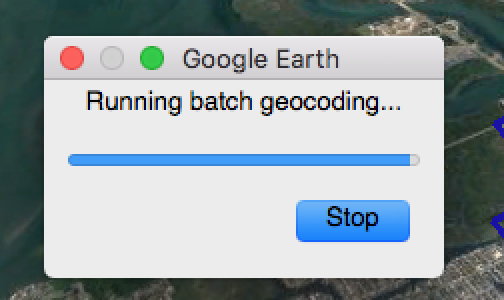
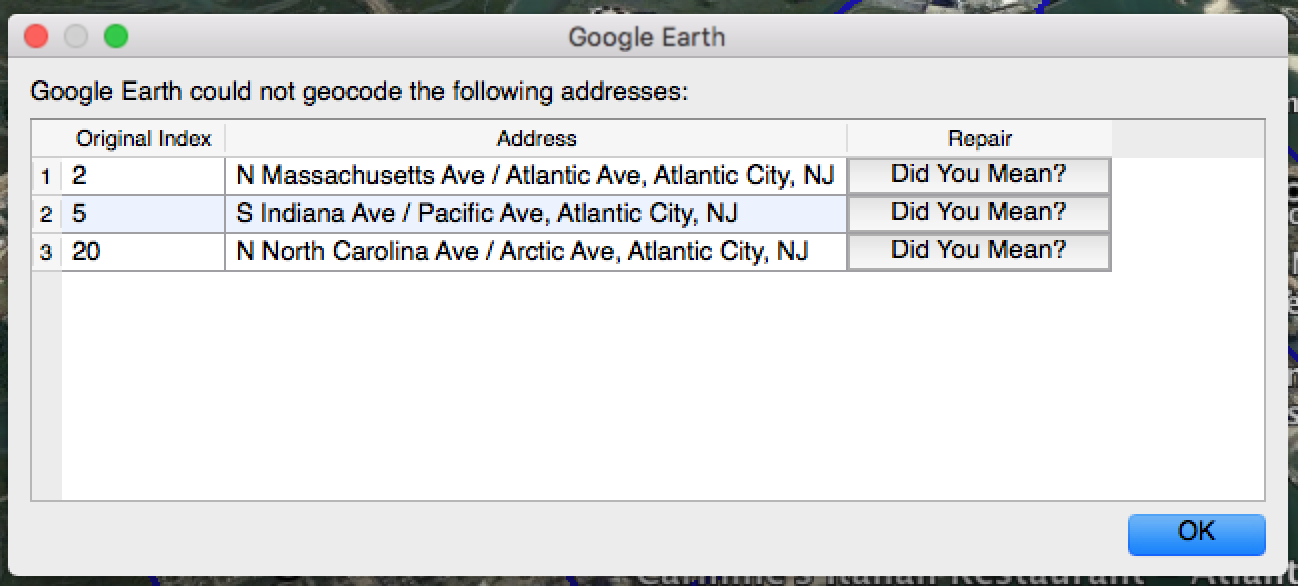
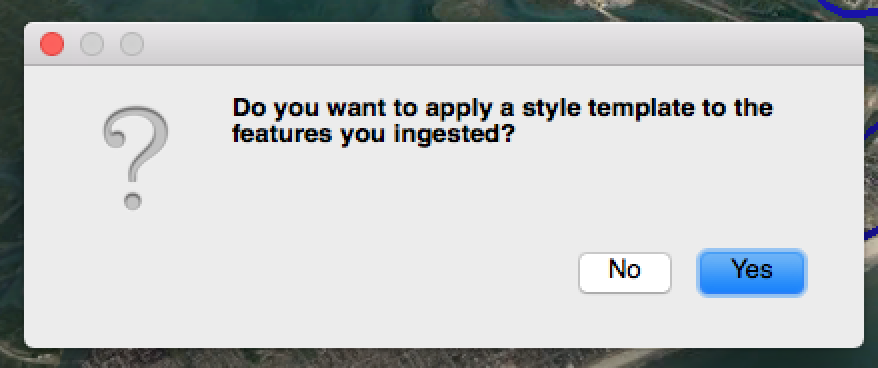
5. After you click the "Finish" button in the Data Import Wizard (previous step), you may see a notification that the batch geocoding is in progress. Let it work. If addresses could not be geocoded, a dialog box will appear allowing you to review and repair the addresses. 6. When geocoding is complete, you'll be asked if you want to "apply a style template to the features you ingested?" This lets you adjust symbology, colors, etc. It's optional, and up to you. For this example, I clicked "No".
7. Now you should see a points on the screen and a map layer appear in the table of contents under "Temporary Places". That's your map with geocoded data. You can zoom in/out, etc. You can right-click on the map layer and select "Save Place As..." to export a KMZ file. Now you have the map on your computer that you can share or upload to the RTMDx software to use for Risk Terrain Modeling. 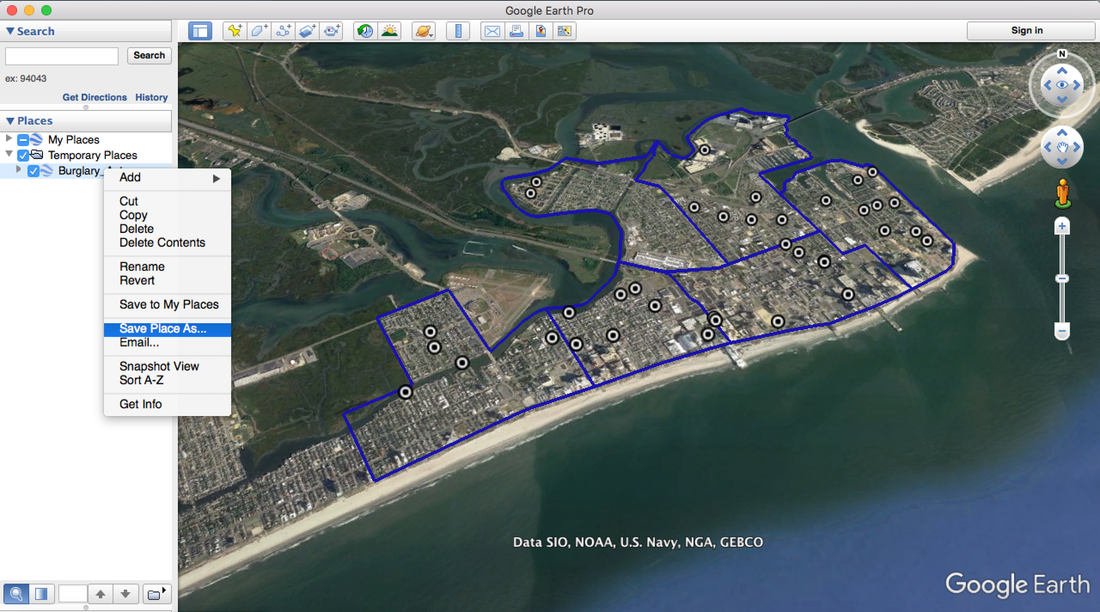 You may also want to try geocoding in QGIS, a free and open source Geographic Information System. Here's how: www.gislounge.com/how-to-geocode-addresses-using-qgis
Comments are closed.
|

 RSS Feed
|
|
The official website of Risk Terrain Modeling (RTM) research and resources, based out of Rutgers, The State University of New Jersey.
|